Table of contents
- 1. Data Integrity
- 1.1. Data Integrity Page Overview
- 1.2. Procedure to Check Data Integrity
- 1.3. Verify By Tape Label
- 1.3.1. Select verification method drop down box
- 1.3.2. Select an Amanda Tape
- 1.3.3. Verify Button
- 1.3.4. Status of Verify
- 1.4. Procedure - By Date
- 1.4.1. Date and Calender Controls
- 1.5. Error Messages
- 1.6. Success Messages
- 1.7. Clear Output
Data Integrity
Checking Data Integrity ensures that the backup data has not been modified after being sent to the backup media.
During various transfers from one media to another, there is a remote possibility that such a change has happened and restoring from such altered data may not give the desired result.
The Data Integrity page reads and verifies that backed up data image on the media has not been modified. In the case of application clients (such as Windows Oracle), the check does not proceed beyond determining whether the tape is readable. In this case, the message “Could not determine validation for dumper“ is displayed and logged. This message can be safely ignored.
Data Integrity Page Overview
The Data Integrity page lets you check out that the already-written media (selected by either date or label) has not been altered after the backup. Run the Data Integrity before restoring a backup image.
Procedure to Check Data Integrity
The default method of invoking a Data Integrity report is by Tape label.
From the Please select verification method drop down box the method of verification can be changed to By Date. Selecting by date displays the appropriate interface controls.
Verify By Tape Label
Select verification method drop down box
This drop down box is shown above. Leave the default choice in it unchanged.
Select an Amanda Tape
In the lower panel, click the drop down box to open the choice of tapes to be selected for verification.
Only one tape can be selected at a time. As soon as a user clicks upon a tape label, the box shuts and the choice made is displayed in the selection box. To examine another tape, select another label.
Verify Button
Clicking the Verify button starts the verification process.
Status of Verify
The right hand panel displays the status of the verification process. The text in the upper right (No 3) changes to indicate that the Data Verification process has started, displaying progress and any errors encountered.
Tip: If you verify by Date, all the Tapes of the Backup Set of the selected date are verified. If you verify by Tape label, only a particular tape is verified. If the Backup Image exceeds one tape, users may want to verify all of them (optional). The correct tape(s) must be loaded in the tape device before the verification can happen.
Even if there is no tape device attached, or the Tape has not been inserted at all, ZMC will wait for the time outs to be over before reporting the failure.
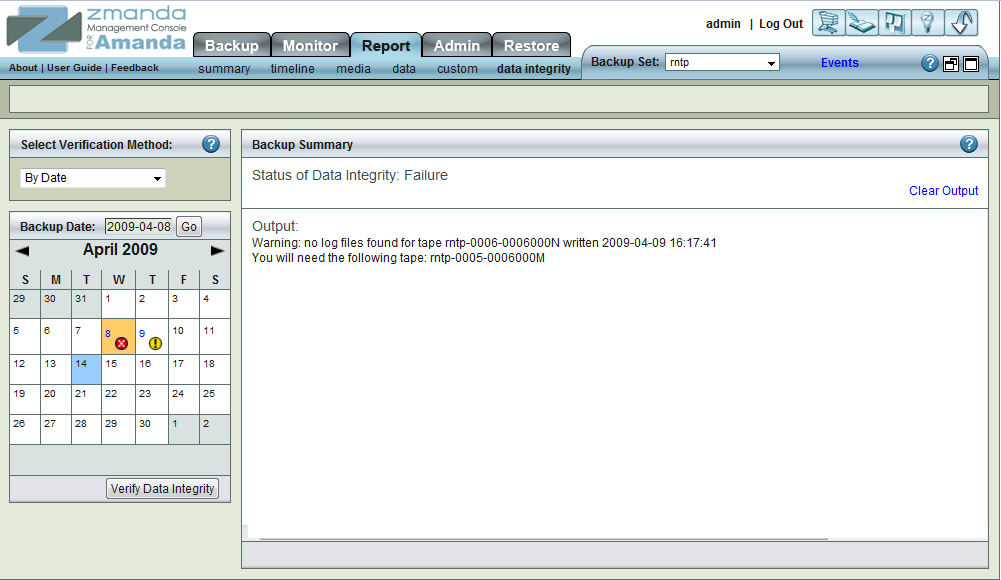
Procedure - By Date
On choosing 'By Date' option the GUI opens to a page with the Calender control in left hand panel, with the current month selected for display. Use the calendar controls to change as desired.
Date and Calender Controls
The top portion consists of a Backup Date input box along with a Go button. Clicking Go displays the given date in the Calandar. The input box accepts dates in both mm/dd/yyyy and mm/dd/yy formats.
The Calendar control at the bottom of the panel works the same as it does for the Summary Report.
Error Messages
ZMC gives different types of error messages that originate from the Tape device. If a verification task is already in progress, a second data verification task cannot be started for the same backup set. If this is done the following error message is displayed.
The error messages are verbose to make it easy to determine what the error were.
Success Messages
One Example is given below:
Clear Output
To clear old messages, click the Clear Output hyper link present at Upper Right Hand corner in Rectangle 2. Clicking it will restore the page to a initial clean status from where the Verify by Date test can be re-run.