Table of contents
- 1. Verifying Backups
- 1.1. Installation
- 1.1.1. How to Verify Installation
- 1.1.2. Messages
- 1.1.3. Clear Output
- 1.2. End to End test
- 1.2.1. Introduction
- 1.2.2. How to run End to End Test
- 1.2.3. Success Message
- 1.2.4. Clear Output
- 1.3. VERIFY SERVER
- 1.3.1. Introduction
- 1.3.2. How to Verify Server
- 1.3.3. Success Message
- 1.3.4. Clear Output
- 1.4. VERIFY CLIENTS
- 1.4.1. Introduction
- 1.4.2. How to Verify Clients
- 1.4.3. Examples of Error Messages
- 1.4.4. Windows Client Error Messages
- 1.4.5. Hyper links in Error Messages
- 1.4.6. Precautions to Prevent Errors
- 1.4.7. Success Messages
- 1.4.8. Clear Output
- 1.5. Move to...
- 1.6. Links to Zmanda Knowledge Base
- 1.1. Installation
Verifying Backups
- Verify Tab consolidates all verification tasks that can be performed in Zmanda Management Console.
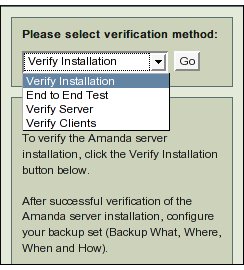
- The four Verification Tasks that can be done are accessed by clicking the 'Please Select Verification Method' drop down box.
Installation
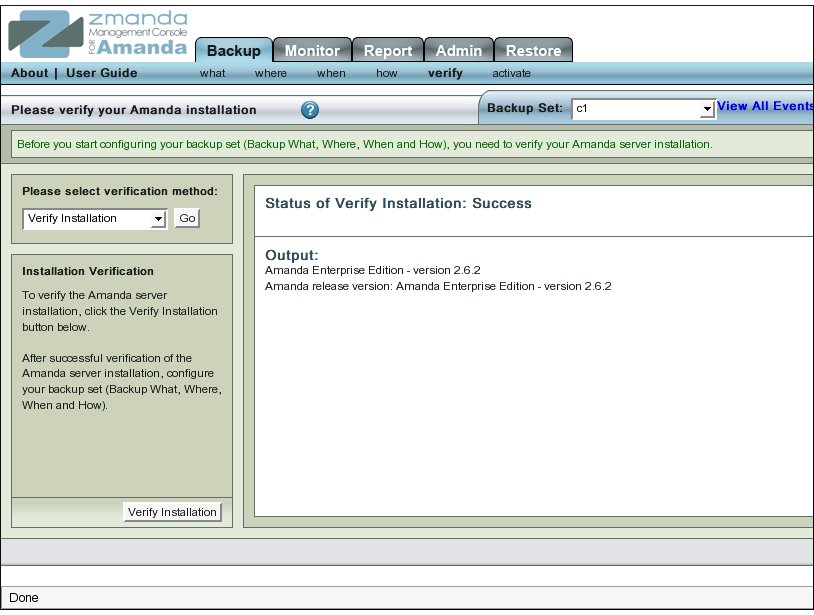
- Verify Installation tab is used to verify the installation of the Amanda Enterprise Edition.
- Verify installation action has to be performed whenever Amanda Enterprise Edition is installed or upgraded.
- It need not be done whenever a new backup set is configured.
How to Verify Installation
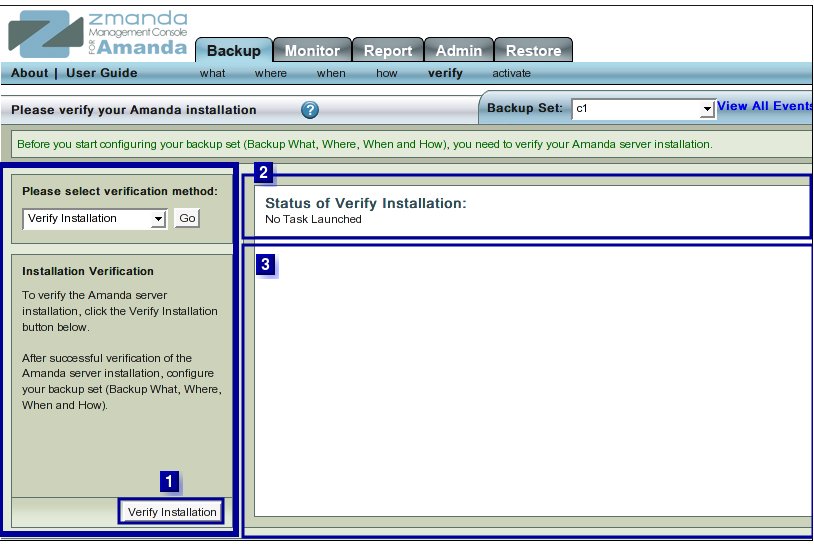
- Click the Verify Installation Button (labeled No. 1 above) to start the process.
- The text in Upper Right hand Rectangle (labeled No. 2 above) will change to indicate that the Installation Verification process has started.
- Further progress messages/ error messages will then appear in Rectangle 3.
Messages
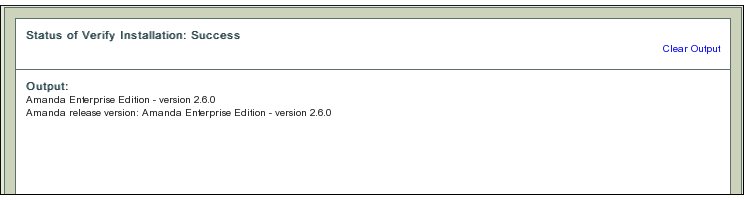
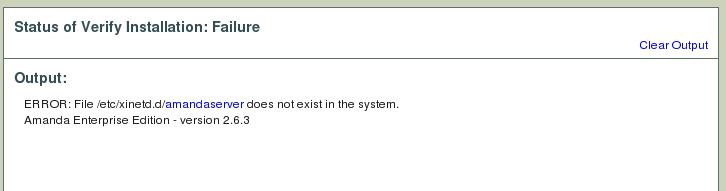
- After a successful verification, ZMC displays the following message:
- On Solaris 10 servers (both x86 and sparc architectures), Verify installation will fail due to lack of xinetd support. This failure can be ignored. Error message will appear as shown in the figure below.
Clear Output
- To clear old messages, click the Clear Output link present at Upper Right Hand corner in Rectangle 2.
- Clicking it will restore the page to a initial clean status from where the Verification process can be re-started.
End to End test
- Verify End to End test performs backup/restore test on the backup set zmc_test_quick to a local disk.
- It allows you to verify that the Amanda server can be backed up as its own client.

Introduction
- Amanda Server is routinely backed up as its own client.
- End to End test option allows user to conduct a quick test that an Amanda server can be backed up as its own client.
- The test creates a "test" backup set.
- The test backup set contains a file on the local machine (Amanda server) that is backed up to a local disk.
- The test does a complete backup, restoration and compare of the restored file contents.
- Run an End to End test whenever
- when new ZMC software is installed or upgraded.
- when the distribution/OS is upgraded.
- Users need not run an End to End test whenever they make a new backup set configuration.
How to run End to End Test
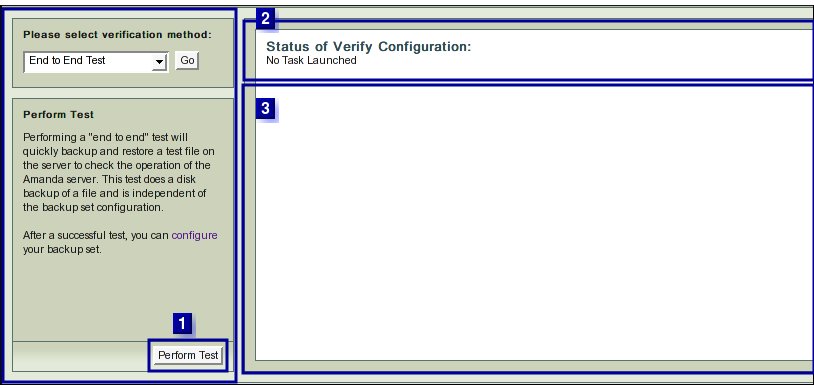
- Click the "Perform Test" Button (labeled No 1 above).
- The text in upper right hand rectangle (No 2 above) will change to indicate that the Configuration Verification process has started.
- Further progress messages/ error messages will appear in Rectangle 3 above.
Success Message
- Success has the following message:
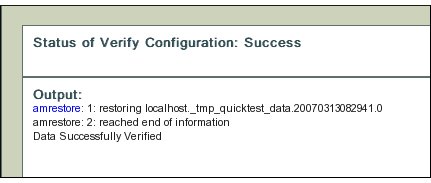
Tip:
Success implies that it is technically feasible to backup data on Amanda Server while treating it as an Amanda Client.
Nothing is implied that this is an optimal overall way to organize user's  backup needs.
Clear Output
- To clear old messages, click the Clear Output link present at Upper Right Hand corner in Rectangle 2.
- Clicking it will restore the page to a initial clean status from where the End to End test can be re-run.
VERIFY SERVER
- Verify Server checks the feasibility of running backup set configuration that users have created.
- Before running Server verification, please ensure that correct backup set has been selected as the check is backup set specific.
Introduction
- Run Verify Server whenever you configure or change a backup set. configuration.
- Do this specially if the change was on Backup Where /Holding Disk pages.
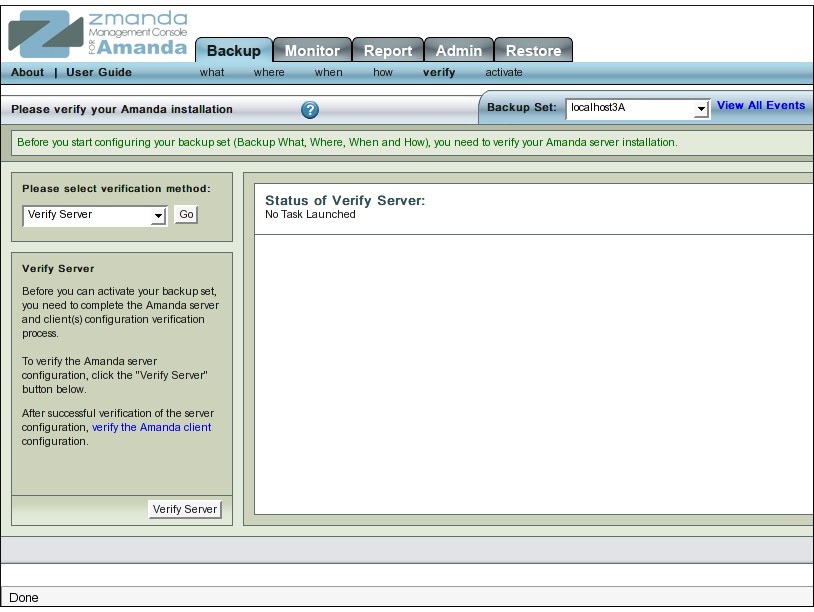
How to Verify Server

- Click the Verify Server Button (labeled No 1 above).
- The text in Upper Right Hand rectangle (labeled No 2 above) will change to indicate that the Server Verification process has started.

- Further progress messages/ warnings /error messages will appear in Rectangle 3 .
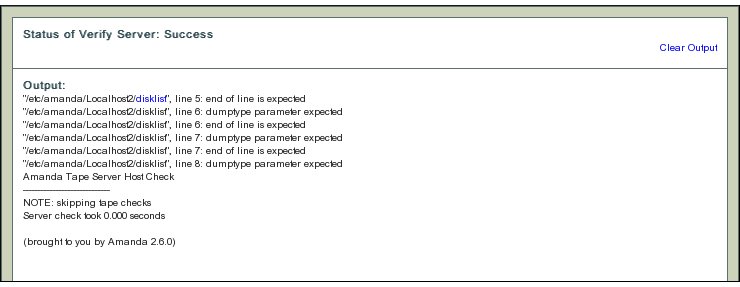
Success Message
- Success has the following message:
Clear Output
- To clear old messages, click the Clear Output link present at Upper Right Hand corner in Rectangle 2.
- Clicking it will restore the page to a initial clean status from where the Verify server test can be re-run.
VERIFY CLIENTS
- The Verify Client option allows users to check out that the Client configuration in a backup set. works.
Introduction
- A Backup Set backup set could have more than one client whose data is to be backed up.
- The Verify Client option allows users to check the Backup set configuration as it relates to each Client.
- Run Verify Client whenever you configure or change a backup set configuration.
- It is recommended to run the Client Verification after any change to the Backup What list.
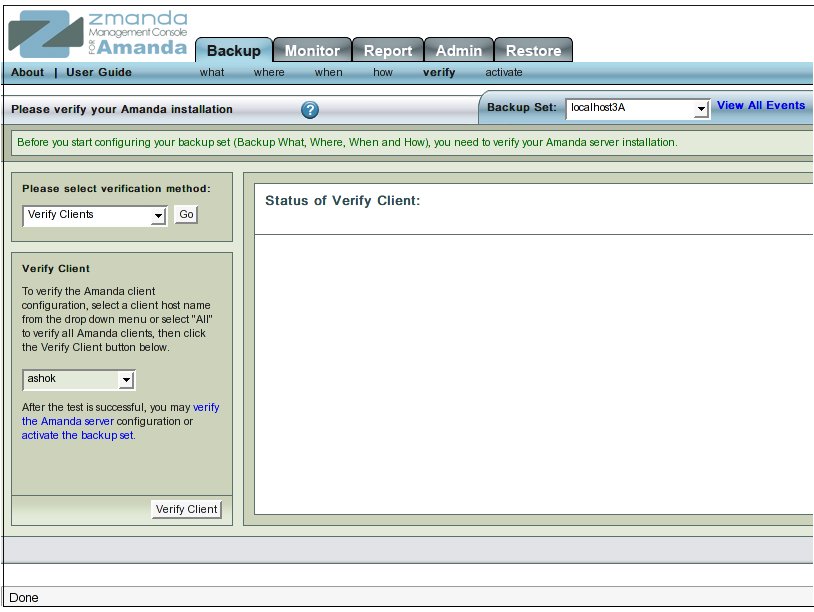
How to Verify Clients
- The Verify Client option has one additional feature compared to other Verify options.
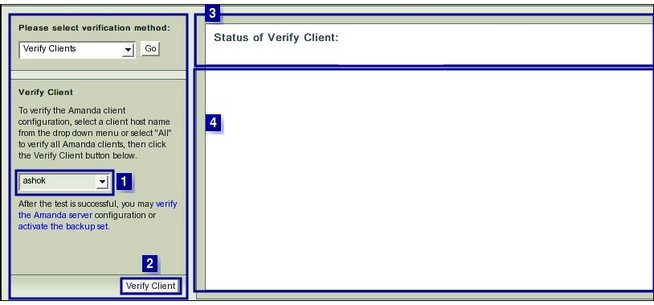
- It has an additional drop down box (No. 1 above) that allows the user to :
- Select 'All' the Client Hosts that have been specified on the Backup What page.
- This is option is at the bottom of the drop down list.
- Select 'All' the Client Hosts that have been specified on the Backup What page.
- or
-
- Select a single Client Host from the drop down list.
- To verify two or more Client Hosts, users will have to chose them one after the other and conduct separate tests for each of them.
- Select either 'All' clients or any one of them to Verify from drop down box No 1.
- Click the Verify Client Button (No 2 above).
- The text in upper right hand rectangle (No 3 above) will change to indicate that the Client Verification process has started.
- Further Progress messages/ error messages will appear in area No 4 .
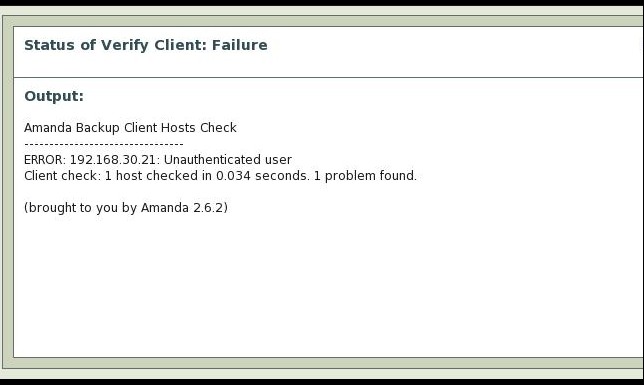
Examples of Error Messages
- ZMC's checks on a Client Host can give rise to a wide variety of error messages!
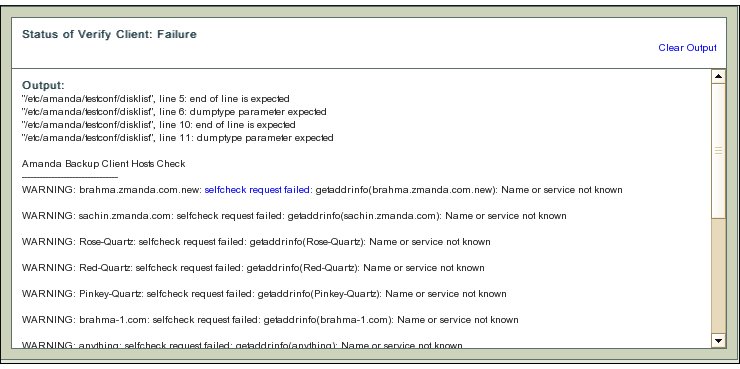
- The error messages are verbose to help users to determine what caused the error.
- Here the Host name specified in the Backup What page (though valid in terms of formatting rules) does not correspond to any entry in the Domain Name Server.
- Hence DNS cannot provide any IP address for the next step of checking to begin.
- Go back to the Backup What page and correct the entry so that it corresponds to a DNS name.
- Come back to this page and verify the Amanda client without having to go through the previous successful checks.
- Verification messages may have links (selfcheck request failed in this example).
- Clicking on the link will provide additional information about the message from Zmanda Network Knowledgebase or the Amanda wiki.
Windows Client Error Messages
- When Users are verifying Zmanda Client for Windows, error messages appropriate to their context will appear.

- In the example above, the Zmanda Window Client had not been started on the client.
- A different error message gets thrown when the user trying to backup the Zmanda Client for Windows is other than "amandabackup".
- A yet another error message gets thrown when the Amanda server cannot connect to Zmanda Client for Windows.
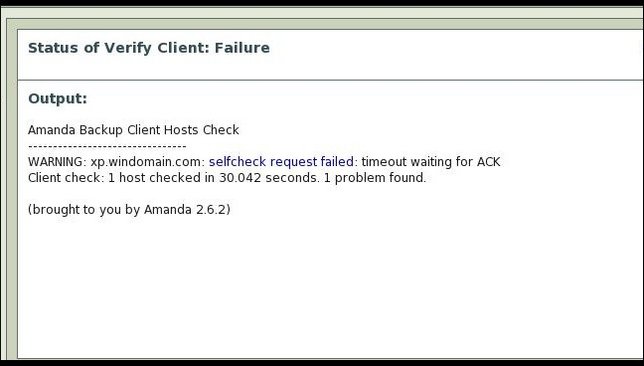
Hyper links in Error Messages
- Error messages do have links on appropriate words. In the message above, the words selfcheck request failed are linked.
- On clicking the words, Users are taken to the Zmanda wiki where more explanation on the Error message exists.
Precautions to Prevent Errors
- The Amanda user must have root access on the Amanda server and all the client hosts that it is expected to backup.
- The Amanda client software must be installed on each client separately.
- If these tasks have not been carried out, Verify client will give users verbose error messages when verifying the client.
Success Messages
- Success has the following message:
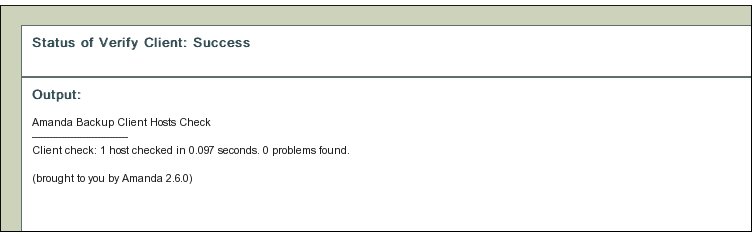
- Please successfully verify all the clients before activating the backup set.
Clear Output
- To clear old messages, click the Clear Output link present at Upper Right Hand corner in Rectangle 2.
- Clicking it will restore the page to a initial clean status from where the Verify server test can be re-run.
Move to...
- On success, users should go to Backup Activate tab.
Links to Zmanda Knowledge Base
- When the term 'localhost' is used in a DLE instead of fully qualified domain name, and if IPv6 is enabled on Amanda server and Linux kernel does not have IPv6 kernel module loaded, the ZMC server configuration verification will fail with "Address family not supported by protocol" error message.
- To fix the problem, change "flags=IPv6" in /etc/xinet.d/amandaserver file to "flags=IPv4".
XXX Knowledge Base Article