MS Exchange Backup
When Amanda is configured and licensed for MS Exchange backup, Amanda uses the Microsoft Windows Volume Shadow Copy Service (VSS) to back up the Exchange database and logs. ZWC backs up and restores MS Exchange at Storage Group level. However, ZWC supports restoring individual stores as well.
ZWC supports full and differential backup of Exchange. It takes a backup of Exchange databases, check point file and transaction logs. It does not backup the Catalog directory (Exchange 2010).
- During a Level 0 (Full) backup, ZWC backs up all databases, transaction logs and checkpoint file. Transaction logs are truncated after a level 0 backup. The full backup includes *.edb (exchange database files), *.stm, E*chk and E*.log files from the database and transaction log directories.
- During Differential backups, ZWC will backup only the transaction logs i.e, backup of E*.log files from the transaction log directories. Transaction Logs are not truncated.
Requirements for MS Exchange Backup
These instructions assume you have already installed and licensed the Amanda server and the MS Exchange server being backed up. Because the Volume Shadow Copy Service (VSS) takes care of any necessary file locking and transaction log pruning during the backup process, the requirements are simple:
- The following MS Exchange versions are supported on Windows 2003 and 2008 Server (Service Pack 2 or later) editions:
- Exchange 2003 (32 bit) Service Pack 2 or later
- Exchange 2007 (32 & 64 bit)
- Exchange 2010 (64 bit)
- Run the command vssadmin list writers at the Windows command prompt and check that the state of the Exchange Writer is stable. If not (or if there are any VSS errors), restart the Microsoft Exchange Information Store service.
In case of Windows 2003 Small Business Server edition, the Exchange Writer is disabled by default. Please follow the instructions this MS knowledgebase article to enable the Exchange Writer: http://support.microsoft.com/kb/838183
- Microsoft .NET Framework 3.5 Service Pack 1 must be installed on the Amanda client. For Exchange 2010 server backup and recovery running on Windows 2008 Server R2 release, Microsoft .NET 4.0 is required on the Amanda client.
- Exchange circular logging must be disabled. If circular logging is enabled, the Exchange server client will only retain the last 5 transaction logs, which may not be sufficient to restore to the most recent backup. This article provides information on how to disable circular logging in Exchange 2010.
Configuring MS Exchange Backups
The Zmanda Client for Windows uses snapshots for Exchange server backups. The procedure described below only backs up the Exchange database and related data files. Other files (such as the Exchange installation directory) require separate configuration for backup.
Creating a Backup Set for Exchange Servers in the ZMC
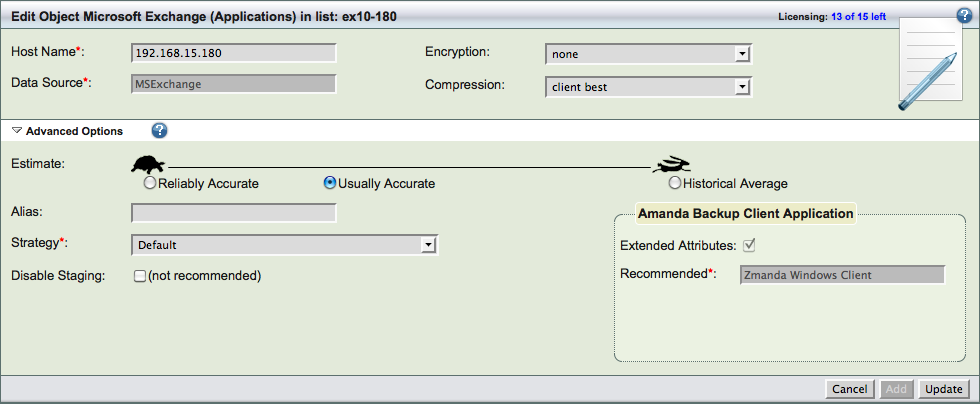
Create a dedicated backup set for each MS Exchange server you intend to back up. On the Backup What page you are prompted to select what type of object you want to back up. Choose MS Exchange, and the following options are displayed:

- Host Name
- The name or IP address of the machine running the MS Exchange server you intend to back up.
- Encryption and Compression
- Check the box to enable these options if desired. They are described in more detail here.
- Advanced Options
- Extended attributes are always backed up on Windows clients regardless of application. For details on other Advanced Options, see Backup Where chapter.
After you have set the options, click Add to add the MS Exchange object to the backup set. You can then configure the backup set just as you would any other by setting the options on Backup Where, Backup How, and Backup When, etc.
Please make sure no other backup software is scheduled to run on the Windows Client at the same time as the Amanda Exchange backup.
Protecting all the MS Exchange Components
Servers running Exchange Server 2003, 2007 and 2010 use Active Directory extensively for the following:
- Active Directory is the configuration repository for Exchange organization data. Without this configuration information, Exchange servers cannot start or function.
- All Exchange directory information is stored in Active Directory. This includes configuration information for all mailboxes, contacts, distribution lists, servers, and sites within the Exchange organization.
- Items such as distribution lists and access permissions for users and groups are also stored within Active Directory
Because Exchange depends so heavily on Active Directory, it is crucial to back up the System State of an Exchange Server along with System State of the Domain Controller running in the Exchange environment so that the Exchange configuration stored in the Active Directory also gets backed up.
Zmanda recommends that you configure separate backup sets for Exchange and System State backups.
Requirements for MS Exchange Restore
- The target Exchange server must have the same Windows OS version and Service Packs as the source server.
- The target Exchange version must be the same as the source server.
- The storage groups and databases must already exist on the target server, and must have the same names as the original storage groups or databases.
- The target server must have the same Organization and Administrative Group name as the source server.
- For Full restore, Dismount all the storage groups.
- ZWC supports restoring individual databases (Stores). For each database that you want to restore, the associated storage group must be dismounted.
- Circular logging must be disabled.
- Make sure that the This database can be overwritten by restore option is selected for the Stores being restored.
Configuring MS Exchange Restores from the Zmanda Management Console
In the event of a server loss, how you perform the recovery will depend on the server role and your disaster recovery plan. Server loss can be caused by software or hardware failure, or by the physical loss of the site where the server was housed. One would also need to recover Exchange databases in case of issues such as database corruption, loss of transaction logs, accidental deletion of mailboxes, etc. Exchange databases can be restored to the same server or to an alternate server depending on the Disaster Recovery plan decided by the Exchange Administrator.
3 types of recovery operations are allowed by Microsoft Exchange:
- roll-forward,
- point in time
- full restore
The state of the MS Exchange server when the restore is started determines what type of recovery will be available. Please see this Microsoft documentation for details on Exchange recoveries.
Here are the steps to follow to restore and recover Exchange using ZWC to the original server or a different server.
Restoring to the Original Server:
- Open Zmanda Management Console and go to the Restore What page.
- Enter the original Exchange Server details in the Initial Host field. If the backup set contains a single DLE for Exchange, msexchange is pre-entered in the Initial Directory field. If the backup set contains more than one DLE, select msexchange from the list. Click Explore to view the data. Select the data to be restored and then click Next.
- On the Restore->Where page, enter the details of the destination Exchange Server in the Destination Host field, and fill the rest of the form out as follows:
- Enter the Destination Username if it is something other than amandabackup.
- Select Original Location radio button. - Review the Restore From and Restore To settings on the Restore->Restore page. Once confirmed, click Restore to start the restore process.
- After the restore completes, the ZMC displays a message asking you to manually mount the databases.
When restoring to the original location, the ZWC restores via VSS. This means that the MS Exchange Information Store service will not be stopped before the restore. The Exchange Writer runs its own pre and post restore operations which are logged in the Windows Application Event log. ZWC does not mount the databases after restore. Therefore you must manually mount the storage groups that were dismounted before the restore. When the storage group is mounted, the Exchange store automatically replays any pending transactions using the Exchange Server soft recovery feature.
Restoring to an Alternate (or Recovery) Server
There are two reasons to restore to a different machine than that from which the backup was taken:
- a disaster has destroyed the original hardware. You must restore the database to a rebuilt Exchange Server or to an alternate Exchange server.
- you are recovering an individual mailbox. In this case, there are additional steps to apply the recovery to the production Exchange server (see the next section below).
There are some pre-requisites to restore to a recovery server:
- Make sure the recovery server meets the requirements for restore listed above.
- Because you are restoring to an alternate "recovery server" that has a different set of log files, the the signatures on the log files must match. To ensure this, either rename the E0x.log file located in the Transaction log directory, or enable the Do not mount the database option while creating a Mailbox or Public folder store.
- Open the Zmanda Management Console and go to the Restore Page.
- Enter the original Exchange Server details in the Initial Host field. Select msexchange as the Initial Directory. Click Explore" to view the data. Select the data to be restored and click Next.
- On the Restore->Where page, enter the details of the destination Exchange Server in the Destination Host field, and fill the rest of the form out as follows:
- Enter the Destination Username if it is something other than amandabackup.
- Select Original Location radio button to restore to original location or Select Alternate Location and enter the value. - Review the Restore From and Restore To settings on the Restore->Restore page. Once confirmed, click Restore to start the restore process.
Recovering a Mailbox
To recover a mailbox, restore to a recovery server as described above, then follow these additional steps:
- Using the Exchange System Manager, run the Cleanup Agent on the Mailboxes to display the restored mailboxes. Then Reconnect the mailbox from which you wish to retrieve the mails to its associated User account. For example, if you want to retrieve mails for user Administrator, then reconnect the Administrator mailbox to Administrator user account.
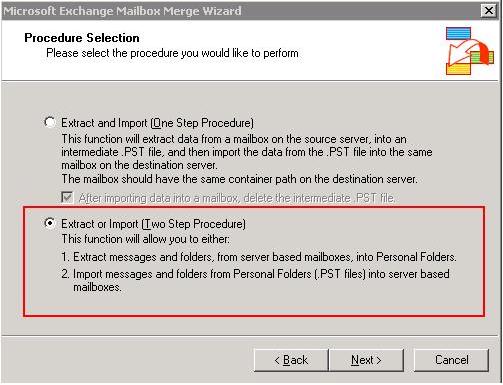
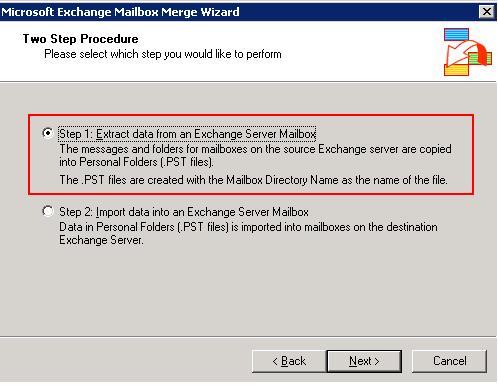
- Use Microsoft's exmerge.exe utility to extract the mails into a PST. Use the Two step procedure, and select Step 1 to create the PST file.


- Copy the PST file to the production server.
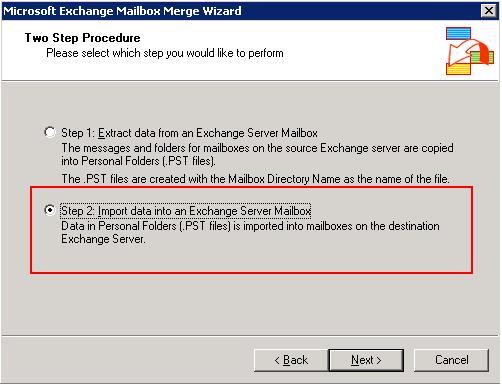
- Run the exmerge.exe utility on the production server to merge the PST mails into the required mailbox. Use the Two step procedure, and select Step 2 to Import the data into an Exchange Server Mailbox.

The deleted emails should now be recovered.
Restoring to a Recovery Storage Group/Database
To restore few deleted mails, one might want to restore the storage group or database to a recovery storage group or database first and then use exmerge.exe tool to recover the required mails as shown in the previous section.
Note: Restoring to a Recovery Storage Group/Database is not supported for Exchange 2003.
Requirements
Exchange 2007
- Create a Recovery Storage Group on the Exchange server.
- Make sure that the Recovery Storage Group or Recovery Database directory is empty.
- Add amandabackup user to the Exchange View-Only Administrators group. Then restart ZWCService.
Exchange 2010
- Create a Recovery Storage Group on the Exchange server.
- Make sure that the Recovery Storage Group or Recovery Database directory is empty.
- Add amandabackup user to View-Only Organization Management group using Exchange Powershell as follows:
Add-RoleGroupMember "View-Only Organization Management" -Member amandabackup
- Set AllowUnencrypted flag to True as follows.
AllowEncrypted is defined on the client end, via the WSMAN: drive. You must be running powershell.exe (or powershell_ise.exe) as an elevated process.
ps> cd WSMan:\localhost\Client
ps> dir
Name Value
---- -----
NetworkDelayms 5000
URLPrefix wsman
AllowUnencrypted false
Auth
DefaultPorts
TrustedHosts
You would change it like so (after changing to the directory above):
ps> set-item .\allowunencrypted $true
- Enable the Exchange Server Certificate in case it is not enabled.
[PS] C:\Windows\system32>get-exchangecertificate
Thumbprint Services Subject
---------- -------- -------
18DDD379D721792012001D294F342FF8380A61F1 IP.WS. CN=Ex-2010
[PS] C:\Windows\system32>enable-exchangecertificate
cmdlet Enable-ExchangeCertificate at command pipeline position 1
Supply values for the following parameters:
Services: IIS
Thumbprint: 18DDD379D721792012001D294F342FF8380A61F1
- Once the Exchange server certificate is enabled, go to Start > Run. Type mmc. Add Snap-in for Certificates > Computer Account. Copy the certificate with Friendly Name as Microsoft Exchange from Personal > Certificates to Trusted Root Certification Authorities.
- Open IIS Manager. Under Exchange Computer Name > Sites > Default Web Site > PowerShell, click on Authentication. Change Basic Authentication to Enable.
Restoring to Recovery Database/Storage Group using ZMC
- Go to Restore What page in ZMC.
- Enter the original Exchange Server name or the IP address in the Initial Host field. Select msexchange as the Initial Directory. Click Select & Explore to view the data. Select the data to be restored and click Next.
- On the Restore Where page, enter the IP address or the name of the destination Exchange Server in the Destination Host field
- Select Windows as the Destination Host Type.
- Enter the Destination Username if it is something other than amandabackup.
- Select Exchange Recovery DB radio button and specify the name of the recovery storage group or database.
- Review the Restore From and Restore To settings on the Restore Restore page. Once confirmed, click Restore to start the restore process.
Troubleshooting Backups
- If an Exchange backup fails, follow these troubleshooting steps:
-
-
Examine the Windows Event Viewer for any VSS or Exchange Writer errors. Run the command vssadmin list writers at the Windows command prompt and check that the state of the Exchange Writer is stable. If not (or if there are any VSS errors), restart the Volume Shadow Copy Service.
- Make sure that the Exchange Storage Groups are in Mounted state.
-
- If a snapshot backup of an Exchange Server 2003 database fails, and event ID 9607 is logged, refer to this Microsoft Knowledgebase article.
- If event ID 9840 or 9607 is logged when a VSS backup operation fails in Exchange 2007 or in Exchange 2003, see this Microsoft Knowledgebase article.
Troubleshooting Restores
- If the Exchange Storage Groups do not mount, refer to Microsoft documentation describing MS exchange storage group access for further information: Top 10 Database Mounting Issues and Their Solutions
- Some important Microsoft documentation for better understanding of Exchange recovery strategies: How to recover or to restore a single mailbox in Exchange Server 2003, and the Exchange 2003 Disaster Recovery Operations Guide
