
- A Holding Disk is a designated space on a disk where backup images are first written before being flushed to a tape.
- As each client host can write in parallel to the Holding Disk, multiple backup images can be written simultaneously.
- In a direct to tape solution, each client host has to write sequentially to the tape, thereby stretching the Backup Window.
- The simultaneous write process is likely to be constrained by either the available network band-width or the write speed of the hard disk, whichever is lower.
- For a very small cost, the overall Backup Window gets reduced enormously.
- Additionally, when the tape is written later on, it can be written at full speed as all the data is already on the hard disk ready to be written. No tape is wasted as there is no waiting time.
Holding Disk GUI
Clicking 'Manage Holding Disk ' link on the Backup Where page, brings up a fresh page where the following data has to be entered.
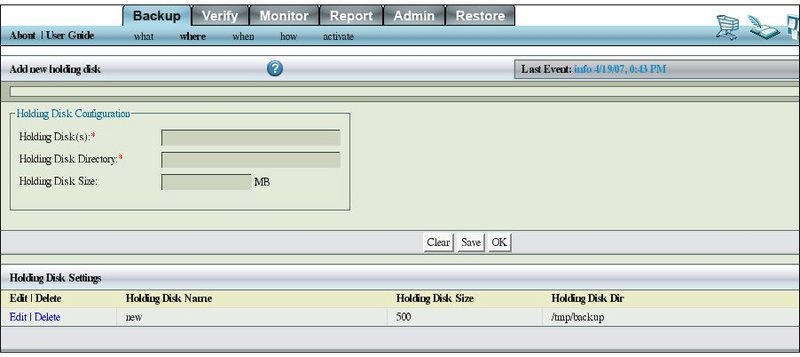
It requires the user to enter the Holding Disk Name, its Directory and its Size.
Holding Disk Names -Valid Choices
- Enter the name for the holding disk to be created.
- ZMC will not validate the name a user has entered at this stage.
Holding Disk Directories -Valid Choices
- Enter the name of an existing directory on the backup server.
- The user can create this directory on the backup server at any time before running the backup.
Holding Disk Size
- The least size of the Holding Disk should be the estimated size of a full backup.
- Setting it at fifty percent more than the estimated size of a Full backup is a better idea.
- Entering 0 value means that the Holding Disk will consume all the available space on the disk, if required.
- Entering a negative value, say -250 indicates that the user wants the Holding Disk to consume all the space on that disk after keeping 250 MB free for other purposes.
- When the data has been entered, click the Save Button.
- The saved data will be shown in a row at the bottom of the page.

- The user can Add more Holding Disks or Edit/ Delete this one.
Multiple Holding Disks
- It is possible to have more than one Holding Disk for a Backup Set.
- Just repeat the above process to add more Holding Disks for the Backup set.
- These get filled up in the order they were defined.
Edit/ Delete Holding Disks
- Clicking the Edit button transfers the existing Holding Disk Data to the window above for editing and then saving.
- Clicking the Delete Button, removes the Holding Disk from uses next time onwards.
- No warning is given for delete button as a user can always re-enter the data to restart the Holding Disk.