Table of contents
- 1. Backup What
- 1.1. Backup What Page Overview
- 1.2. Backup What Page - Main Functionalities
- 1.3. New Edit Duplicate Delete Buttons
- 1.3.1. New and Edit Buttons
- 1.3.2. Duplicate Button
- 1.3.2.1. Editing Duplicate Entry
- 1.3.3. Delete Button
- 1.4. Host and Directory Names
- 1.5. Exclude Files
- 1.6. Encryption and Compression
- 1.6.1. Compress files
- 1.6.2. Encrypt files
- 1.7. Fresh Pages from New or Edit Buttons
- 1.7.1. New Button - BackupWhat Edit Page
- 1.7.1.1. Object to Backup Box
- 1.7.1.2. Backup Method Box
- 1.7.2. Edit Button
- 1.7.1. New Button - BackupWhat Edit Page
- 1.8. Next Steps
Backup What
- The main functionality ofBackup What page is to allow users to specify What is to be backed up in terms of multiple combinations of a Host and its Directories.
- Running on a single server, ZMC can back up the whole or a portion of the Enterprise.
- To implement the backup in an efficient manner, it provides for dividing the Enterprise into Backup Sets and sub-dividing each Backup Set into Disk List Entries.
- The process of creating a Backup Set begins by defining What is to be backed up.
- ZMC allows users to go below the level of a host in defining What is to be backed up.
- Users can define What is to be backed up by defining it as combinations of a Host and Directory(s).
- ZMC refers to such Host and Directory combination as a Disk List Entry (DLE).
- The combination can be further refined by excluding files/directories from it.
- Encryption and Compression options can be set for each DLE to improve security/ efficient usage of resources.
Backup What Page Overview
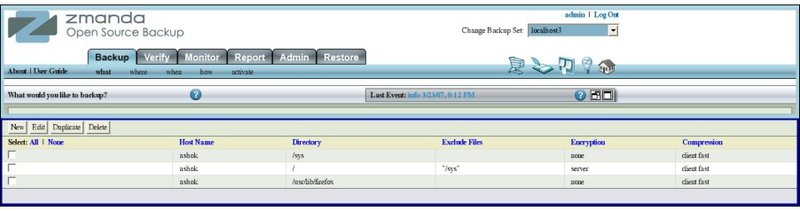
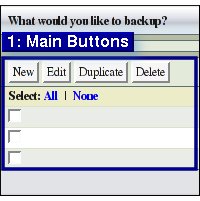
- Like all other functional pages of ZMC, the Backup What page has its main functionality in the center, while other common-to-most-pages functionalities are grouped at the top of the page.
- Explanation of common functionalities enclosed in a light blue rectangle at top in Fig. 1 can be found on the Common Functionality page.
- In the image above, the main functionality area is enclosed in a Navy Blue rectangle.
Backup What Page - Main Functionalities

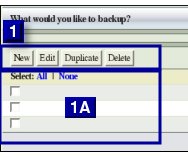
1. Box 1 displays the New, Edit, Duplicate, and Delete buttons that aid users in specifying What is to be backed up.
 2. On clicking the New or Edit buttons, an additional page opens that aids in Add/Edit actions on Disk List Entries.
- The New button works without checking any box.
- Box 1A Check boxes need to be selected for the Edit, Duplicate and Delete buttons to work.
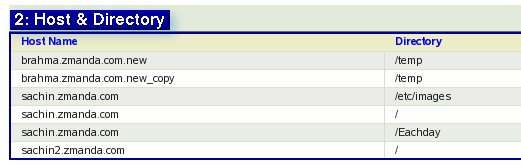
3. Box 2A lists Host Name (i.e. Client Host that users are Backing up) 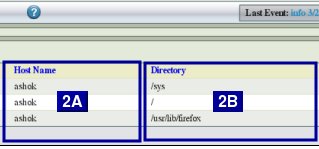
- A new Backup Set has no data to display.
- For an existing Backup Set, data will be displayed here.
4. Box 2B lists the Directory (i.e. a Directory on the Host specified in the same row) that is to be backed up.
- All directories/files below the directory specified are automatically(recursively) included in the backup.
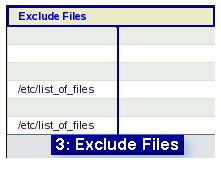
5. Box 3 lists Files to be excluded from the Backup.
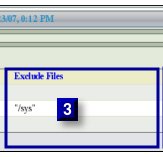
- To exclude more than one file, enter a regular expression or enter the path to a file that contains the full list of files to be excluded.
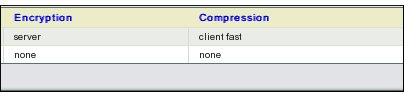
6. Box 4 lists Encryption and Compression choices.

New Edit Duplicate Delete Buttons
- New Edit Duplicate Delete Buttons:
New and Edit Buttons
- New or Edit buttons clicks take users to a different page (BackupWhatEdit page) where users can enter or edit the information.
- This is discussed in detail a little later under the 'New or Edit Buttons' section.
Duplicate Button
- On clicking the Duplicate Button, for each box that has been checked, a Duplicate entry is added to the list with expression' _copy' added to the host name.
- NB:This does not create a Duplicate Backup Set.
- It creates a duplicate Disk List Entry that must be edited.
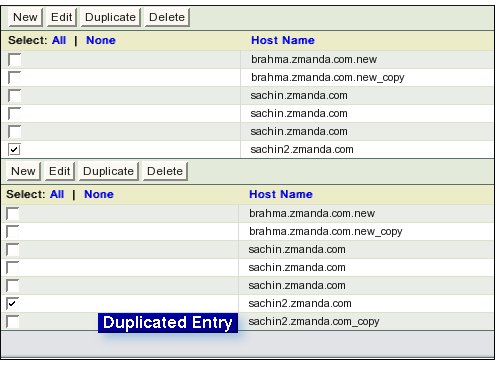
Editing Duplicate Entry
- Automatically, the newly created Duplicate entry is selected for editing. Please see the Edit Button section on how to rename the Duplicate Disk List Entry.
 TIP:
 Duplicate is useful if users  have named the Hosts in patterns like ABC1, ABC2, ABC3 etc.
 It is also useful to specify different exclude files and Encryption/ Compression options on the same host.
Delete Button
- Select the entry to be deleted by checking it.
- Click the Delete Button.
- The checked entry is silently deleted.
- There are no warnings and no way to undo the delete.
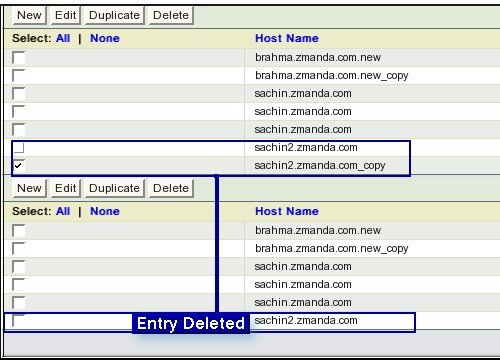
- Users need to create a fresh entry to undo the wrong delete.
Host and Directory Names
- Host Names are made up from Alphanumeric characters.
- They can also include either one of the two special characters, the period '.' or the dash '-'.
- These special characters need to be included in between the usual Alphanumeric characters.
- When the Duplicate Button is clicked, the duplicate Host Name has the string '_copy' attached to it.
- This name is illegal and users are expected to edit it to a legal name.
- There can be multiple Disk List Entries with the same Host Name.
- However the combination of Host Name and Directory must be unique.
- Directory Names have to follow the naming conventions of the host.
- Recursively, all sub-directories and their content will be backed up when a directory is specified.
Warning: Host Names and Directory names are case sensitive.
For the Backup to happen, the Host name must correspond to a DNS entry that the Backup Set will look up on the ZMC server.
The Directory name must correspond to a directory on the particular host.
The Directory path must be an absolute path and not a relative one; otherwise, it will not be backed up.
TIP 1:
Use a fully qualified host name while entering the name of the local host as a client.
If not, ZMC will give a warning at the time of running the Verify Client check.
TIP 2:
When Tape is the Backup Media, carefully consider using multiple top level Directory
entries for the same host.
Multiple top level Directory entries may result in a lower restore time,
if users are  seeking to restore individual files within those Directories.
Tip 3:
Having Multiple Host cum Directory combinations with different exclude lists and
Encryption and Compression options optimizes Backup and Recovery.
Exclude Files
- Specifying Exclude Files aids in optimizing the performance of the Backup set.
- If users specify a Host name and the root directory, ZMC will backup everything on that server.
- ZMC uses GNU-tar utility which supports exclude lists.
- ZMC allows users to specify only one wild card expression or the path to an exclude file per Disk List Entry.
- The Exclude File option then comes into action and the specified files are not backed up by that DLE.
Some simple examples:
Exclude any file or directory that ends in ".log" e.g.  ppp.log, Xfree86.0.log. Specify *.log
Exclude any file or directory with the string "log" e.g.  logfile, maillog, syslog,
ppp.log,XFree86.0.log. Specify *log*
Exclude any file or directory that starts with string "cron" and ends in ".gz"
e.g. cron.1.gz, cron.2.gz, log/cron.1.gz. Specify *cron*.gz
The question mark can be used to specify a single character. e.g. log.1, log.2. Specify log.?
- When an exclude list file is to be used, then, it should reside on the client-host to which it refers. Hence the path to the exclude list must be in reference to it.
- The exclude list file can be named anything that pleases users and can be created with any text editor.
- It should have only one exclusion entry per line.
Advantages of exclude files option
There are three different uses of exclude file option.
- Firstly, users want the excluded data not be part of any Backup Set.
- Such data tends to be quite small in quantity and does not save much.
- Secondly, the exclude list operates to exclude the data from Compression or Encryption options.
- Users can save on precious CPU cycles, network traffic, and size of backup window.
- Thirdly, if the data on the host is organized in such a manner that implementing multiple top level directories in different disk lists makes no sense, exclude lists may allow users to organize the backup with possibility of faster restore for some files. The files would be excluded from the general backup and kept in separate Disk List Entries.
Encryption and Compression
- Encryption and Compression Choice
- In the Backup What Edit page reached by clicking the New or Edit button, users will be able to set/edit if they want Encryption and Compression done to the DLE.
- When done,user's choice will be displayed on the Backup Whatpage.
Compress files
- ZMC compresses the data on the Client.
- This results in lesser bandwidth being consumed while the Backup image is being transferred to the Backup server.
- ZMC supports compression using gzip and the data can be uncompressed almost universally.
- Many Tape drives have built-in hardware compression.
- There are many advantages in allowing that hardware to handle the compression task.
 TIP:
 Anticipate difficulties of uncompressing backed up data when a device that uses
 proprietary compression algorithm fails.
 Users  may also face difficulties when that device is no longer in use/usable.
 For images and other pre-compressed files,do not waste Backup time
 trying to uselessly compress them.
Encrypt files
- Usually backed up data is not guarded with as much care as live data is.
- Encrypting such data adds a layer of protection against misuse.
- ZMC encrypts the data on the server.
- It uses amcryptsimple encryption.
- Encryption passphrases are stored in amandabackup user directory on the server.
Tip: Encryption is a CPU intensive task. Enable it with care.
Fresh Pages from New or Edit Buttons
- This section discusses in detail the New and Edit buttons.
New Button - BackupWhat Edit Page
- Users do not have to select anything before clicking the New Button.
- Clicking it takes the users to Backup What Edit page where they can create new Disk List Entries. </font>
- The details users are expected to enter are:
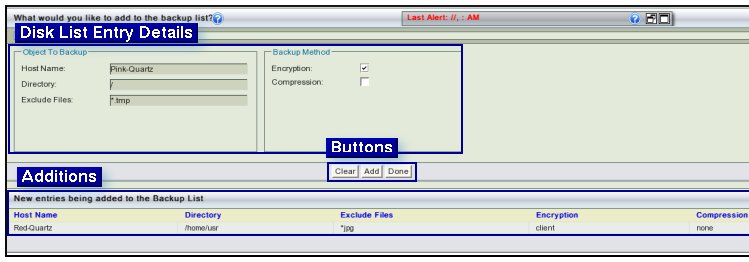
Object to Backup Box
- 1.Host Name - Compulsory
- 2.Directory Name - Compulsory
- 3.Exclude Files - Optional
Backup Method Box
- 4.Encryption Yes/No - Optional
- 5.Compression Yes/No - Optional
After the details have been entered, users are expected to click the Add button which is the central button of the three buttons at the right.
- Users will be warned of an invalid Host name when the Add Button is clicked.
- Till users click the Add Button, they can go back to any box and alter its entry.
- Clicking the Clear Button will delete all unsaved details in one go.
- Users can enter more than one Disk List Entry details on the page.
- Just click the Add Button after each entry.
- It will be added to the list at the bottom of the page.
- Click Done to save and go back to the Backup What page.
Edit Button
- Users have to select the Disk List Entry that they want to edit before clicking the Edit Button.
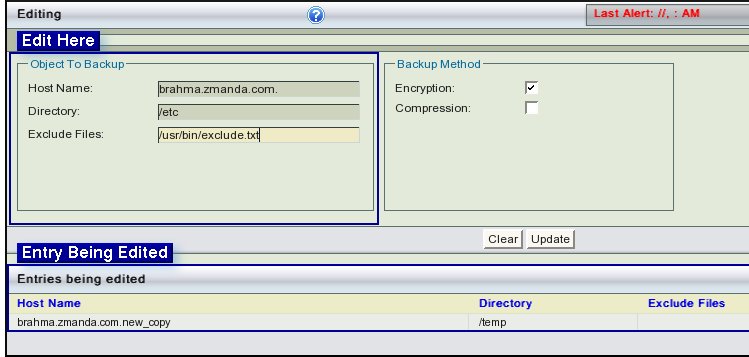
- On the Backup What Edit page that opens, the existing entry is displayed at the bottom.
- The same contents, ready for editing are also displayed in boxes above.
 NB:The page now displayed when Edit button is clicked, differs from the page displayed when New button is clicked in only one respect.
The buttons at bottom right hand side are only two in number and are labeled Clear and Update respectively.
- The Illustration shows that the host name has been edited, with '_copy' string at the end of its name, deleted.
- It also shows that the Directory has been changed from /temp to /etc.
- It shows that the Exclude file name is being entered.
- Click Update Button to end the editing.
- Users will be taken back to the previous page, where the edited entry will be shown in its original place.
Next Steps
- To continue the process of setting up a Backup Set, please click the Backup Where tab.
- If users are editing only the Backup What part of an existing Backup Set , please move on to Verify tab.