Zmanda Documentation > RestoreWhere
Table of contents
RESTORE WHERE
Introduction
- The Restore Where is the second step in the restore/ recovery process in Zmanda Management Console.
Restore Where Page Overview
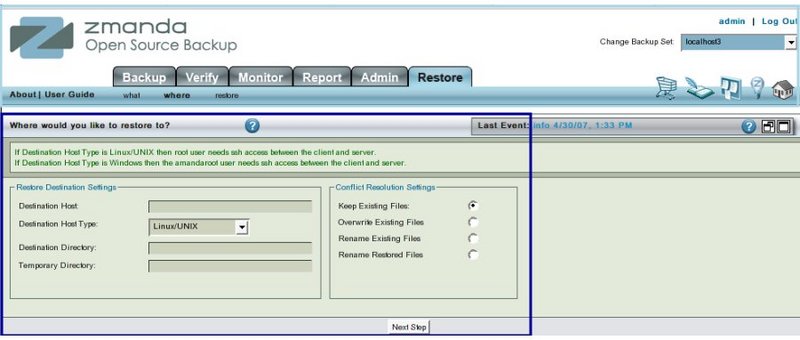
- Like all other functional pages of ZMC, the Restore Where page has its main functionality in the center, while other common-to-most-pages functionalities are grouped at the top of the page.
- Explanation of common functionalities enclosed in a light blue rectangle at top in Fig. 1 can be found on Common Functionality page.
- In the image above,the main functionality area is enclosed in the lower Navy Blue rectangle.
Restore Where Page - Main Functionalities
- The main functionality of the Restore Where page is to allow users to select where the data is to be restored.
- It also allows users to pre-resolve potential conflicts in restoring data. For example whether to permit over-writing an existing file at the proposed location.
Restore Where Page - Procedure
Restore Destination Settings Panel
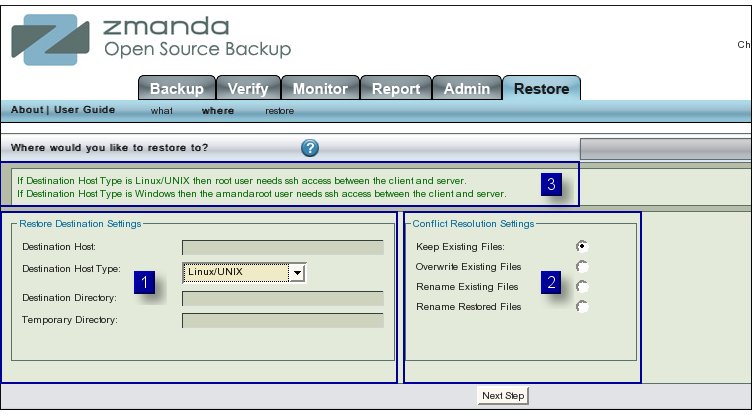
- The Restore Destination Settings panel (left panel No 1 above) seeks four initial parameters about the data that users are trying to restore.
- Destination Host.
- Destination Host Type.
- Destination Directory.
- Client Temporary Directory.
Destination Host
- The Destination Host is the host where you want to store the restored data.
- It can be the same host as from which the data had been backed up.
- If Destination Host is left blank, then ZMC assumes the default value "Amanda server" i.e. the host on which ZMC is installed.
- The Destination Host should have ssh running on it and grant ssh access to the appropriate user (as explained in Destination Host Type below).
WARNING:
If users does not have ssh permission between the server and client where restore is to be done, the user will get an error message as the following

ssh connection to mymachine.company.com refused
- Please modify ssh configuration to give proper access rights to users.
Destination Host Type
- The drop down box allows users to chose between 'Linux/Unix' or 'Windows' types .
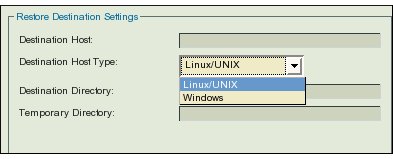
- If the Destination Host is running Linux , then the data will be restored as user root.
- If the Destination Host is running Windows , then the data will be restored as user amandaroot and not amandabackup.
- The Message box at No 3 above pre-displays a message about using different users as ssh rights will be with those users.
Warning:
When the host directory is Linux based and the Destination Directory in Windows based,
then the Run Restore action will look as if it has apparently failed.
Users will get a warning message on the GUI:
"WARNING: Permissions will not be preserved on the destination. Restore will appear to have failed"
But in fact the Run Restore action would have extracted the relevant files to the
specified Windows directory.
Destination Directory
- Destination Directory is on the Destination Host.
- It is the directory on which ZMC can make available the restored files for examination.
- If Destination Directory is left blank, an error is thrown till users specify a destination directory.
WARNING:
Destination Directory MUST be specified by an absolute path.
Client Temporary Directory
- Client Temporary Directory is like a scratch pad on the Destination Host that ZMC uses to hold temporary files while it is doing the restore.
Conflict Resolution
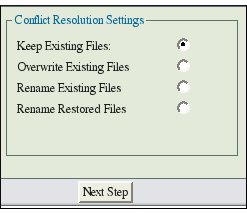
- The right hand Conflict Resolution Panel above allows users to chose one among the four options.
Keep Existing Files
- The first option "Keep Existing Files" will not overwrite the existing files with the restored files in case of a conflict. The restored files that are conflicting will be discarded.
Overwrite Existing Files
- The second option "Overwrite Existing Files" on the other hand will overwrite the existing files by the restored files if there is a conflict.
Rename Existing Files
- If the third option "Rename Existing Files" is selected, and there is a conflict, then the conflicting existing files will be renamed to "original_filename.original.timestamp". This will clearly distinguish the existing file from the restored file.
Rename Restored Files
- The fourth option "Rename Restored Files" will on the other hand rename the restored file if a file by that name is already existing. The restored file will be renamed to "restored_filename.restored.timestamp".
In all the 4 options above, the non-conflicting files will NOT be affected.
Next Step Button
- Clicking the 'Next Step' Button at the bottom takes users to Run Restore page.